Note: This tip assumes you have a basic understanding of how Layers work in both Inkscape and Synfig.
When you are planning to export a project from Inkscape to Synfig, it's a good idea to first organize your Inkscape drawings in Layers. (Better yet, you should always take advantage of Layers in any project.) This will help you keep everything organized when you open the project in Synfig and start to animate.
Here is an Inkscape drawing of a character called Arthur Kill, the Mad Cupid. The animation will consist of Arthur Kill firing the gun. Only the arm, hand, and gun will move as part of the kick-back.
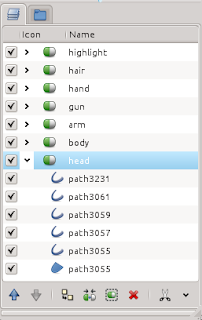
Here are the screenshots of the Layers Panel in both Inkscape and Synfig, respectively:
Synfig, right screenshot, imported the image perfectly, and kept intact the layer's name. One of the unique things about Synig is that every object, element, and effect gets its own layer. So when you open up the Encapsulated Layer in Synfig you notice that Synfig has created a layer for every separate path that I made in Inkscape:
So setting up layers properly in Inkscape will make animating my project that much easier.
Links:
Inkscape to Synfig export plugin
Encapsulated Layers in Synfig
You can follow the progress of this animation at WIPUP.org or on my personal website.


No comments:
Post a Comment